Thursday, 28 October 2010

Octillery

I am spooky...!
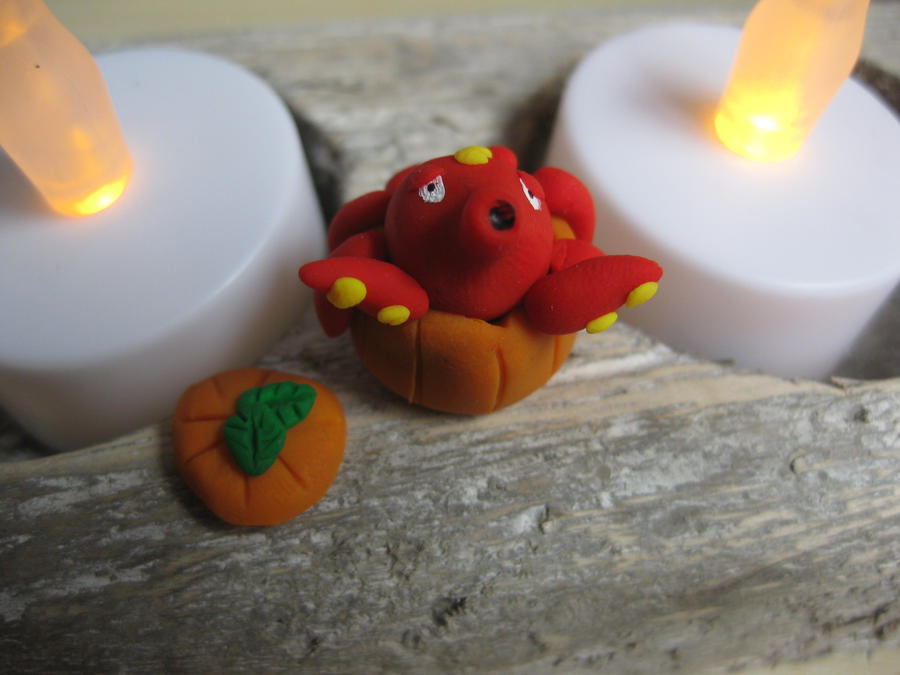
For Halloween I made this Octillery in a pumpkin. It was quite easy and fun to make :)

Colours needed:
  • Sweet Potato
  • Red
  • Yellow
  • Black and white paint
  • Green
I started out with the pumpin. Make a ball of Sweet Potato clay and cut off the top. Then empty it out by using a knife, so that something can be put inside of it. I picked the Pokémon Octillery, but this can of course be anything. Carve the lines in it with the back of a knife, do this as well for the top. You make the leaves by shaping them in a teardrop shape, making a cut through the middle and on the sides.

Octillery started out as a ball as well, from which I formed his snout. With the tip of a pencil I made a little dent in his snout, which I later painted black. After this I made 8 tentacles, 6 of which are just hanging on the sides of the pumpkin. Two of the tentacles are sticking out to make it seem like Octillery says BOO!

Then I applied the yellow dots to the head and the two tentacles poking out. I painted the eyes on, something I normally don't do, but with red clay it's inevitable that your white clay will become pink... Therefore I made it with paint. A tiny dot of black for the pupil. Afterwards put a small piece of red clay over the eyes, so that it gets the drowsy look it always has.

Bake it for 10 minutes at 130C or 275F and there you go, a perfect Halloween decoration with a pokémon theme :)

Sunday, 10 October 2010

Squirtle

Use Watergun!
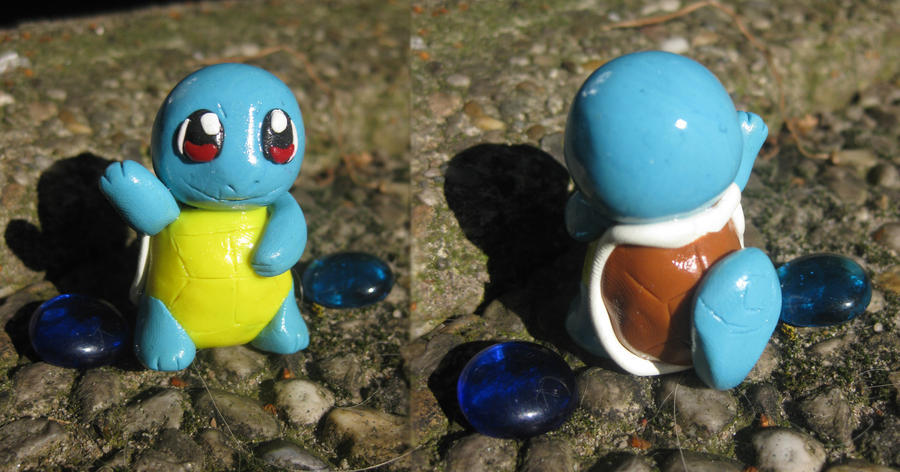
Pokémon is one of my childhood games that will always be a part of me. I've always adored Squirtle (though I always picked Charmander as a starter). I spend roughly 45 minutes on making this sculpture, including making it all shiny and taking a picture.

Colours used (Sculpey III unless mentioned otherwise):
  • Mint in combination with Blue
  • Yellow in combination with Ivory
  • Terracotta in combination with Yellow
  • White
  • Red
  • Black
I started out with his head. I just made a round ball of the first colour mentioned, then formed it slightly so that it had a nose. With a knife I carved in his nostrils, mouth and eyebrows. The next part was putting on the eyes. Two equal sized slices of black clay, flattened, with a white dot on top of them. There is red on the bottom of the eyes and a small white line on the side of the eyes.

Then I made the body, which is invisible due to his shield. It was necessary to make it because of the stability of the sculpture and to connect the head to the body well. From the same colour as the head I shaped two arms, two legs and a tail. However first it is time for me to create his shield.

I did the terracotta back first. Just a flattened ball which I modelled around the body. Then I took the yellow part and stretched it all over his tummy, so that there wouldn't be any body visible between the terracotta and yellow clay. Next was putting the shield like template on his yellow and terracotta shield. This I did with a small knife as well. The arms and legs are just pushed against it, the dents (nails) once again made with a knife.

Then I put on the white border around the terracotta shield.This was quite a challenge seeing that white stains very easily and it had to look like a seamless edge. I eventually managed to do that and put the tail over the seam that was still visible. The tail has a little curl carved into it. I glazed it with Varnish.

That's basically the whole sculpture! If you're interested in buying it, feel free to send me an email at claydoodles@gmail.com! Thanks for reading :)

Sunday, 3 October 2010

Shorty Bonaparte

He wasn't actually short =)
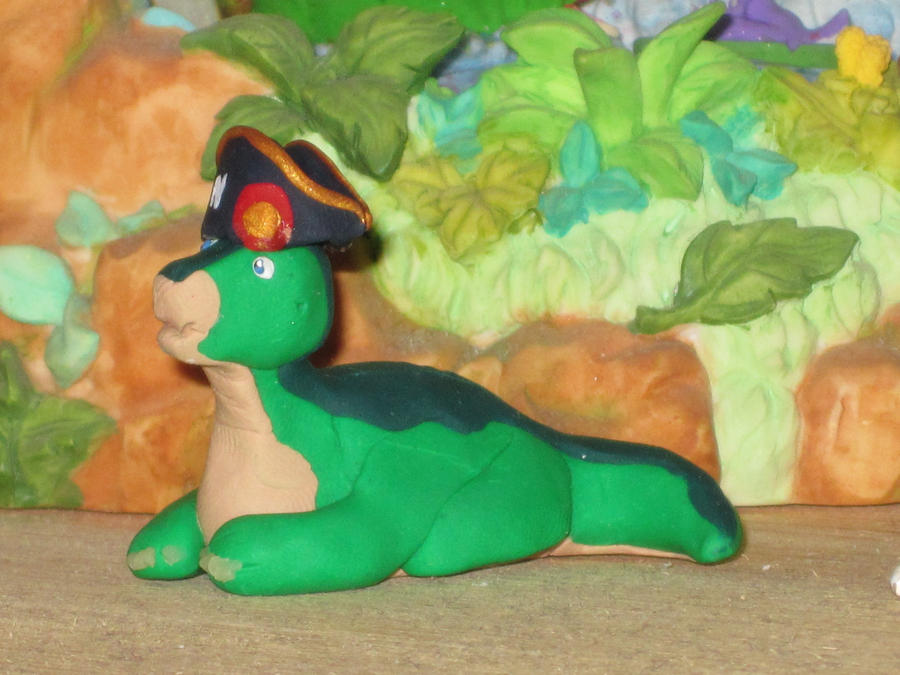
I made Shorty Bonaparte for a friend of mine. He is a Land Before Time fan (just like me) and also a history fanatic. I thought it would be nice to combine the two for a birthday present. Happy Birthday!

It has been a while since I made this sculpture, so I may have forgotten some details.

The Body
Colours used:

Green
Green merged with Yellow
Tan
Transparent
Blue
White

I sculpted the four legs out of the green merged with yellow colour. It made a nice colour for shorty's body. I connected them to a big lump of clay which eventually became the body. I 'pulled' a neck out of the body, which was first longer than it is on the picture right now, but of course when working on it everything gets deformed. The head was shaped with my fingers and put on the neck with an iron pin to keep it secured.

When I had the base it was time to add some details to Shorty. The first thing I did was take the tan, put it over his face and his tummy. Then I made a small cut in his face where his mouth is. I took a patch of green, which I cut in the right shape before applying it to the top of the body (made it shorter for the nose, etc). What you cannot see very well is that there are wrinkles on his back like Littlefoot has them as well.

I put some nails on his front paws with small triangles of transparent clay.The eyes are patches of white polymer clay with a light blue colour on them for the iris, black for the pupil (not really visible on this picture) and white for the reflection. I poked a little ear in the side of his head with a toothpick, which is a bit higher on the left side compared to the side you see it on right now.

The Hat.

Navy
Red
Gold

The hat is made of 2 pieces of navy stuck together on the sides. It fits on shorty's head perfectly. It has a golden outline on top only, and a red/gold medal on it as well. There is an N painted on the front of the hat and an S on the back of the hat.

Saturday, 2 October 2010

The Cake...

is a LIE!
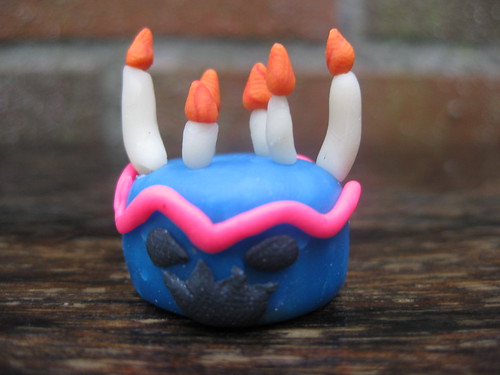
The cake is a lie, created for a comic which was created for a contest. To view the comic, click here.

Colours used:

Transparent Blue
Hot Pink
Ivory
Red and Just Orange (for the flames)
Brown (for the cake base).

I made a cake base from brown clay and put the transparent blue over it, making it all nice and smooth as if it was icing! After that I made a string of pink clay and put it up as 'decoration' (but also as the eyebrows of the monster). Two of the candles are used as horns, the other are just for decoration. The other side of the cake looks innocent, but in fact the cake is a big monster!

Thursday, 30 September 2010

Cherubi

Cherubi
This is a random white space.

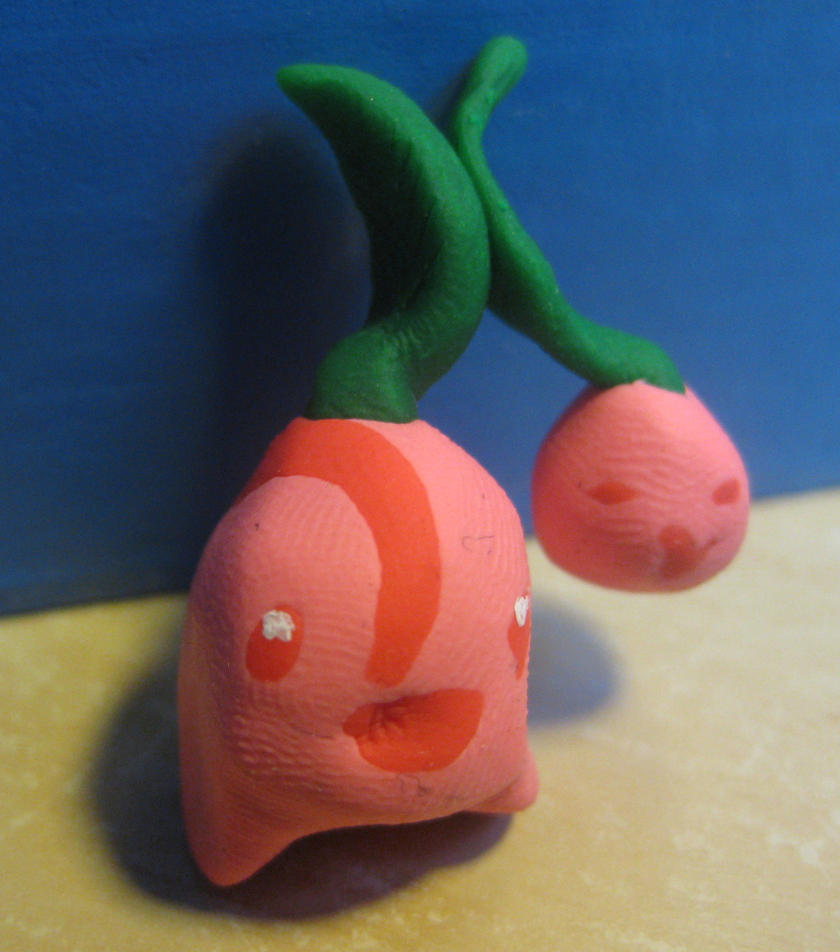
Cherubi is one of many pokemon. This is a very small sculpture, which is why the fingerprints are extremely visible. I plan on getting some plastic gloves soon, so that fingerprints will no longer be there.

I made two balls of clay which were White merged with Coral (Sculpey III). I connected them by two leaves made of Green. The mouth, eyes and stripe are made of Coral, and the white eye sparkle with white acrylics.

Monday, 27 September 2010

Carrots on the moon

They're on a date!
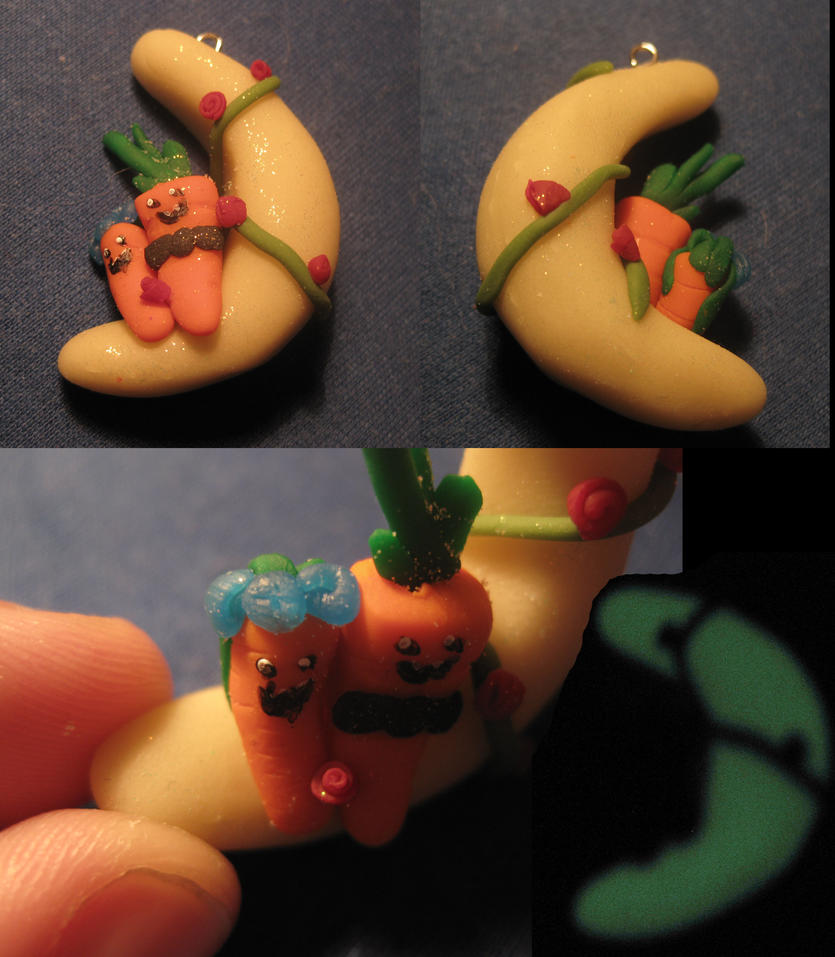
These lovable carrots are on a date on the moon... Or a huge peeled banana, whatever you make of it. It's a pendant and can be used as a charm of kinds.

The moon is made of Glow in the Dark (Premo) clay, which i just modelled into this crescent shape.It has an eyepin inserted at the top to make it into a charm.

The carrots are made of 'Just Orange' (Sculpey III). I made the male carrot a bit larger than the female one. The male carrot is wearing a black bowtie, and the female carrot is wearing a Transparent Blue (Fimo Effect) ribbon. The 'hair' of the female carrot is pressed against her head, as if it's combed backwards. I added the carves into them with a small kitchen knife.

Once again the vines with roses, I think that's an addiction of mine. The vine is this time made of 'Green' (Sculpey III) and the roses are this time made of Red (Sculpey III).

I painted their faces on with Acrylics, something I realized I should not have done. They were cuter without faces :) Also, there are glitters all over them, they have no brand.

Hogwarts Begginer's Set (Created: September 25, 2010)

Only the Crystal/Glass set is missing!
I happen to love the books written by J.K. Rowling, the Harry Potter series. Ever since the first book came out I've been an avid reader and right now I'm very much so looking forward to the 7th movie, even though the movies are not even close to the greatness of the books.

The first book explains in full detail what a first year student at Hogwarts should have. This list also gets send to Harry Potter. Hagrid takes Harry to London to buy his supplies.

From left to right:
  • Wizard robes and a winter clock with silver button
  • Red Dragonhide gloves
  • Black Wizard Hat
  • Telescope
  • 2 copper scales
  • Books and a wand
  • Black Cauldron with spoon 
The hat and the robes are made of Black (Sculpey III). For the robes I just took a rectangle flattened piece of black and fold it in the middle once. I repeated this 3 times for a nice stack of clothes. I put a winter coat over it, with a silver pin as prescribed in the letter. The Hat is just modelled by hand, no silly tricks regarding that one. After baking I painted it with white acrylics.

The Red (Sculpey III) gloves are very tiny, but patterned by making small squares with a small kitchen knife. The scales are Copper (Sculpey III) and are not quite normal scales, but I did not really feel like making them really awesome, since they do not really play a big part in the book.

The colour for the telescope is made by merging black with silver, both Sculpey III. This gives a sparkly effect. If you have sparkles, you can also mix them with black for the same effect. I made a flattened plateau for the telescope to stand on. Two strings squished together make the stand, and a cylinder shaped telescope on top of it. I added a drop of Liquid Polymer Clay to make the glass effect. After baking it I put some varnish over the 'glass' as well, to make it extra shiny.

The Cauldron is made by the same colour as the telescope. I made the plateau for it by just molding it with my hands, and putting 4 tiny balls of clay below it as the 'legs'. The Cauldron self was made by modelling some clay on a marble, cutting of the edges so that they would be nice and round. The marble can just be baked with it, and can be taken out later. After taking it out I filled the kettle with liquid polymer clay, added some random pieces of red and yellow clay for the herbs and a black string for the spoon. I baked the cauldron again after this. The water is also varnished after baking.

I made the books by taking Ivory (Sculpey III) for the pages. The covers are either made of dark green or navy, and one of them is beige. They have letters written on them in white paint. Nothing special about the books otherwise.

The wand is a piece of brown clay modelled into a string. I 'carved' some patterns in it, which are not really visible on the picture.